

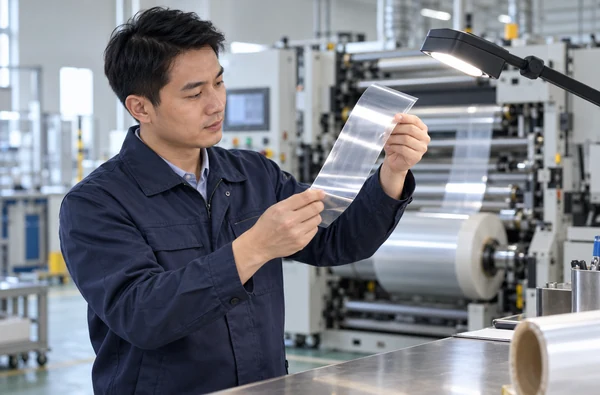
How to Evaluate a Screen Printer for Scratch-Sensitive Roll-Fed Film
A glossy film can enter a press looking clean and leave with a line that catches the light. Before choosing another machine, find out where the mark first appears. A scratch in the film coating, a scuff in the printed ink and a mark made during rewinding call for different tests.
Winshol describes its WL-500GT cylinder-bed screen printer as a roll-fed, single-color machine with handling intended to reduce surface scratching. It has a drying oven. That makes it a relevant machine to trial for a sensitive film, but the catalogue does not promise a scratch-free result. Bring the production roll and agree on how the finished surface will be judged.
Find the first point where the mark appears
Start with an untouched sample from the incoming roll. View both sides under the same angled light used for finished inspection, and note any marks already present. Keep it beside samples taken after unwinding, after the printing section, after the oven and after rewinding. If die cutting or lamination follows, inspect that output too.
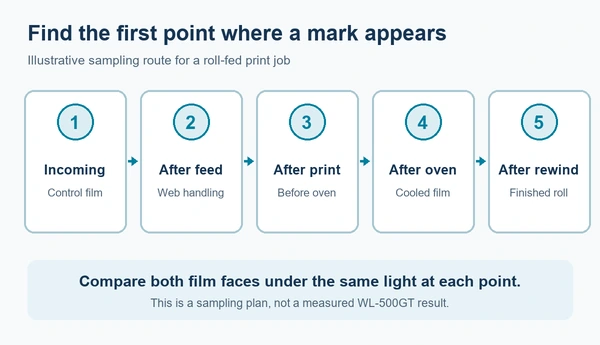
The location and appearance of a mark help narrow the next check. A repeated line in the same cross-web position suggests a recurring contact point, but it does not identify the part by itself. A blemish that appears only over printed areas may be an ink problem. Marks discovered only when the roll is unwound again point to the need to inspect winding pressure and the contact between layers. Confirm the cause by comparing samples from adjacent stages.
| Sample point | What to compare with the incoming film | Useful next question |
|---|---|---|
| After unwind and feeding | New lines, pressure marks, particles or coating changes on either face | Which surfaces touch the film before it reaches the screen? |
| After printing, before drying | Marks in bare film versus marks confined to wet ink | Is the substrate damaged, or is the printed layer being disturbed? |
| After the oven and cooling | New scuffs, tack, curl or changes in gloss | Did the ink dry as required, and did the material tolerate the exposure? |
| After rewinding and the next converting step | Blocking, rub marks and defects in the first, middle and last sections of the roll | Does the accepted finish survive normal handling? |
Photograph the defect beside a ruler. Note its position along the roll, the lane and the first stage where it appears. Inspect control and trial samples under the same light. “The film scratched” gives the equipment team little to work with; “a bright line 40 mm from the operator-side edge first appears after feeding” points to a part of the web path.
Separate film damage from ink damage
If a line remains visible through an unprinted area, investigate the film surface and its web path. If the ink layer rubs or transfers while the surrounding film is sound, review the ink system and drying conditions. A pressure mark can also change gloss without cutting through either layer. Keep the failed sample for the material and ink suppliers rather than naming every visible line a scratch.
Nazdar’s explanation of dried and cured inks makes a useful distinction: ink that feels dry may not yet have its full resistance to handling. Avery Dennison’s film-printing bulletin also recommends testing ink on the intended film and describes scratch and rub checks for the printed surface. Those sources explain why a clean-looking print at the oven exit still needs checking after cooling and rewinding. Use the chosen ink supplier’s test procedure and the customer’s end-use limits; neither document supplies a pass value for every film and ink.
If the printed layer fails while the base film remains sound, put the next trial into the ink and drying conditions: ink choice, deposit, oven setting, residence time and time before winding. If bare film is marked before printing, follow its contact points first. Separating the two cases may save a machine change that would never have addressed the defect.
Trace web contact and tension through the whole line
Ask for a web-path drawing from unwind to rewind. Mark which face contacts each roller or support, where guiding and feeding take place, and where the material enters and leaves the oven. Note any existing coating or preprint that must stay on the outside of a roll. A machine photograph cannot show every contact point in the quoted line.
“Turn down the tension” sounds simple, but the web still has to track without slipping or wrinkling. Avery Dennison’s tension-control bulletin lists slip and scratching among the defects associated with poor tension control. It also explains why unwind and rewind need to respond as roll diameters change. Log the tension settings and roll diameters at the beginning and later in the trial, alongside surface observations.
Enercon’s web-handling guidance identifies film scratching among the problems poor handling can create in converting equipment. On the proposed line, inspect roller surfaces, cleanliness, alignment and the route taken by the sensitive face. Use the actual coated film. A durable uncoated sample may come through clean even when the customer’s film will not.
Record changes one at a time. If tension, speed, winding pressure and roller contact all change together, a cleaner second roll will not tell you which adjustment helped. A short, controlled run at an approved setting is more informative than a single perfect label taken from startup.
Match the WL-500GT to the artwork and drying route
The WL-500GT product specification lists an unwind unit, a single-color cylinder-bed printing section, feeding equipment and a drying oven. Its catalogue also describes guided unwinding and suction-assisted material pulling. These are features to examine on a machine drawing and in a trial; the listing does not identify a universal scratch-prevention setting.
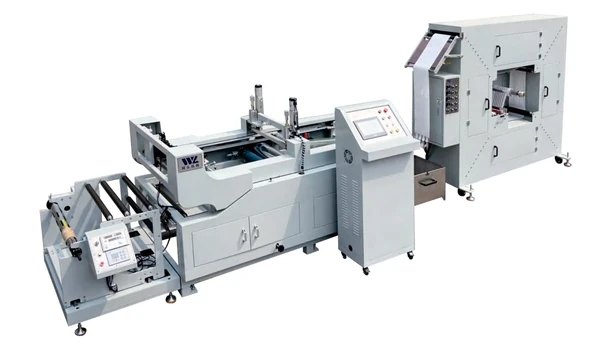
Its stated maximum web width is 500 mm, maximum print area 500 × 800 mm and maximum feed length 500 mm. Those are separate catalogue entries. Do not assume that an 800 mm-long image can run at an 800 mm repeat when the same table lists a 500 mm maximum feed length. Send the artwork with the feed direction, repeat, lanes and clearances marked, and ask Winshol to confirm the usable layout. Our web-width versus print-area guide explains the checks that belong on that drawing.
Match the oven to the selected ink and film. Give the ink supplier the material construction, surface treatment, intended deposit and next converting steps. Use its starting drying guidance, then examine the cooled, rewound sample. More heat may help one ink test while altering the film surface or its dimensions. The site’s UV versus hot-air drying guide covers process selection; the listed WL-500GT configuration uses an oven.
The main machine dimensions are listed as 3600 × 1300 × 1600 mm, with a 220 V main-machine supply and a 380 V oven supply. Request the full line footprint and electrical schedule for the quoted configuration. The catalogue’s speed entry uses an unclear unit, so a timed run on the job is the sensible basis for an output estimate.
Run a trial that follows the production route
Bring film from the intended production construction, including its coating and liner. A narrow offcut of a different grade can help set up the machine but cannot approve the surface result. Supply the proposed ink, artwork, repeat and a sample showing the most objectionable mark. Tell the trial team whether the critical face is printed, coated, laminated or left exposed in the finished product.
Before running, agree on the inspection method and what counts as acceptable. A physical reference sample is useful for gloss and fine marks that are hard to judge from a photo. Define where marks are allowed, if anywhere, and whether the finished label must also pass ink adhesion, rub and registration checks. The customer specification should set the limit; the machine catalogue does not.
If the setup permits, first pass unprinted material through the proposed handling route and inspect it at named stations. Then print the intended image and run it through the oven at the ink supplier’s starting conditions. Check cooled samples before winding and again after a representative section of the roll has been rewound. The difference between those samples shows whether the new defect belongs to feeding, printing and drying, or later roll contact.
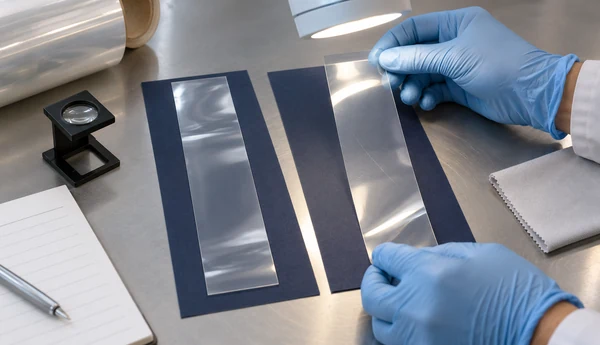
Take samples at startup, during steady running and near the end of the test roll. Inspect the operator-side lane, center and far edge where applicable. Log web speed, tension settings, oven conditions, reel diameter and every change made during the run. Count rejected labels at the agreed finishing stage and write down why each group was rejected. This gives both a surface-quality result and a usable output figure. The roll-to-roll output guide explains how to estimate accepted labels per clock hour from a timed job trial.
Keep the failed pieces. A long narrow line in bare film, ink that offsets onto the next wrap and a dull band after the oven should not be combined into one “scratch rate.” Report each defect with its first observed station and the setting that produced it. When the trial passes, keep the approved sample and operating record with the quotation.
What to send with the equipment enquiry
Send the production material and liner specification, roll width, thickness, diameter and coating details. Add dimensioned artwork, the feed direction, print repeat, registration marks, ink and required drying route. Include a photograph and physical sample of any unacceptable mark, with its location on the roll and the stage where it first appeared.
The quotation should include the full web-path drawing, roller-contact information, oven arrangement, installation requirements and a trial plan using your stock. Compare the finished samples and accepted output with your current process, if you have one. The site’s screen printing machine RFQ checklist covers the other details needed for a quotation. Send the sample brief through Winshol’s contact page.
Common questions
1. Does a cylinder-bed printer guarantee scratch-free film?
No. The WL-500GT catalogue highlights handling intended to reduce scratching. The result depends on the film, coating, ink, web path and settings. Approve it from finished samples made on production stock.
2. How can I tell whether the film or the ink is damaged?
Compare an unprinted area with the printed image and keep samples from before and after drying. A mark in bare film points toward material or handling; a rub mark confined to ink calls for an ink and drying review. Confirm with the relevant material or ink supplier’s test.
3. Will lowering web tension stop scratches?
Not necessarily. Too little control can allow slip or wrinkles, while excessive tension can create other problems. Measure the trial result across the roll as its diameter changes and use the film supplier’s limits.
4. Can I use a 500 mm web for a 500 mm-wide printed image?
The catalogue lists 500 mm as the maximum web width and 500 × 800 mm as a maximum print-area pair. Edge margins, image position and the orientation of that pair still need a drawing and confirmation. The separate 500 mm feed-length entry also needs checking against the repeat.
5. Will a hotter oven remove surface scuffs?
It may change ink drying, but it cannot repair a scratch already in the base film. Confirm the ink supplier’s drying method and the film’s heat limit, then inspect after cooling and winding.
6. Should I judge the machine from a clean sample at the oven exit?
Inspect the rewound roll and the next converting step as well. Some marks appear only when layers contact each other or when the web is handled again.
7. What result should the machine supplier report?
Ask for the number of accepted finished labels, rejection reasons, sample positions, actual web and oven settings, and the length and duration of the trial. Keep the approved surface reference with that record.
