

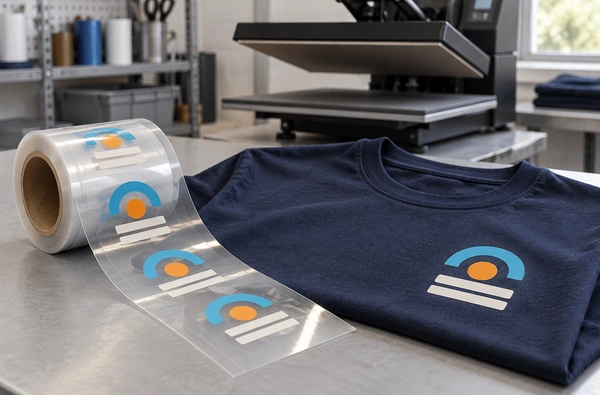
How to Choose a Screen Printing Machine for Heat Transfer Film
Choose a screen printing machine for heat transfer film by specifying the carrier film, ink system and product that will receive the image. Match the complete artwork repeat to the machine format, then verify registration and drying through the required printing passes. Sample approval should include transfer, peeling and inspection of the image on the receiving product.
Winshol lists heat-transfer applications for the WL-5080CCD and WL-5080DW. These are roll-fed screen-printing configurations with different registration systems. Their catalogue data can support a shortlist; a trial with the actual carrier and transfer process should settle suitability for the job.
Start with the product that will receive the image
A finished-product sample gives the equipment supplier a useful starting point. Send it with the enquiry and identify the material, required appearance and tests it must pass after transfer. A logo applied to a stretch garment will have different acceptance requirements from a decorative image on a rigid component. That application determines the ink and drying requirements.
For a textile label, the brief may include the fabric composition, color, construction and any surface treatment. The approved image might need to survive a defined wash procedure or stretch with the garment. A rigid product needs the adhesion, appearance and service-condition tests in its own specification. Set application conditions for the chosen receiving material.
Prepare a drawing that shows the image as it should appear on the finished product. Include a readable word or an asymmetric feature so the trial can confirm the artwork orientation. Mark the printing face of the carrier and agree whether each screen file needs to be mirrored. Show the intended layer order, including any backing, blocker or adhesive required by the chosen transfer system.
Marabu’s textile-printing overview describes printing onto film followed by application to textiles with a heat-transfer press. Include that later operation in the process drawing and define the scope of the quotation. Printing and drying, cutting the printed web, and applying the transfer may require separate equipment.
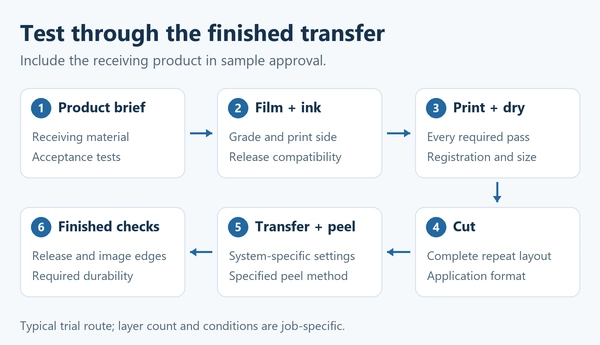
Specify the release film as a production material
The enquiry needs the exact film grade. Include the manufacturer, thickness, coating, printable side, surface finish and specified peel method. A roll-fed trial also needs the web width and reel details. Have the film supplier identify the grade intended for the chosen ink system.
Coveme’s KTR range for plastisol screen printing distinguishes matte and glossy finishes, one- or two-sided printable films, and hot- or cold-peel options. It also lists grades for sheet and roll-to-roll processing. These choices belong in the purchasing brief because the release surface is part of the transfer process.
The carrier, ink and adhesive need a joint review by the consumable suppliers. The print must remain usable through transport and storage, then release under the intended application conditions. Test that release on the production film, including complete image transfer and any residue on the carrier. A cheaper setup material can be useful for threading, but approval requires the specified film.
Film condition can change between passes. Measure reference distances on incoming material and after the proposed drying sequence and cooling, using consistent measurement conditions. Record any curl or distortion that affects feeding, mark reading or later cutting.
Pre-shrinking depends on the film grade and process. Coveme’s KTR TXS brochure describes it as optional and generally unnecessary for that range. Follow the guidance for the film being purchased and verify its dimensions in the trial. Our film pre-shrink guide explains the measurements behind that decision.
Fit the complete layout to the printing configuration
The job layout needs to include the image, registration marks and the margins needed for handling and cutting. Put the feed direction on the drawing. Check the repeat along the web as well as the image width; a web that passes through the machine can still carry artwork outside its printable area.
The two Winshol configurations have the following catalogue limits:
| Specification | WL-5080CCD | WL-5080DW |
|---|---|---|
| Registration configuration | CCD visual registration | Three-point registration |
| Maximum web width | 520 mm | 510 mm |
| Maximum print area | 500 × 800 mm | 500 × 800 mm |
| Maximum feed length | 800 mm | 800 mm |
| Screen frame size | 800 × 1000 mm | 800 × 1000 mm |
| Drying configuration | Hot-air dryer | Drying oven |
| Main machine supply | 380 V | 220 V |
The supplier should confirm artwork orientation and usable margins on the complete layout. If a repeat contains several separate garment labels, show how the printed web will be divided into pieces for the application station. The web width versus print area guide covers the format checks in more detail.
The WL-5080CCD catalogue identifies right-side feeding, a moving-screen arrangement and suction-assisted material handling. The separately listed WL-5080CCD-Y has left-side unwinding. Review the floor layout and access for threading and roll changes when comparing those orientations. The complete dryer footprint and electrical load need their own quotation data.
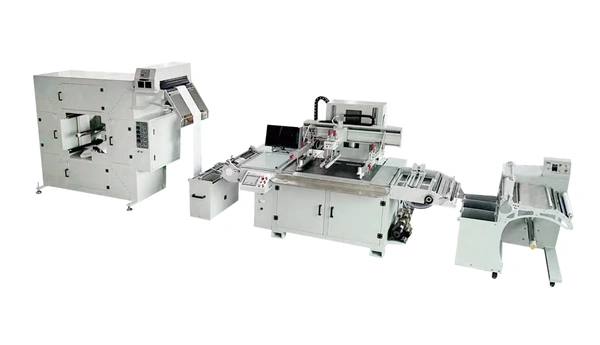
The WL-5080DW is listed as a single-color machine. Count every print required by the job and show how the material reaches the next pass. For example, three image colors, a white backing and a printed adhesive would mean five printing stages. Use the approved transfer system and artwork to establish the actual layer sequence.
Check registration through the full pass sequence
Registration requirements belong on the drawing. Mark the overlap between colors, the edge of a backing layer and the position of any printed adhesive relative to the image. Give each relationship a tolerance and a measuring stage, such as after the last drying pass or after transfer.
For CCD registration, supply the marks that the camera will use on the production film. A clear carrier can look different against the machine’s support surface, so the demonstration should use the actual mark color and layout. Check that the reference remains readable after earlier layers and drying stages. Our CCD registration-mark checklist covers the artwork preparation.
For the WL-5080DW, have the supplier demonstrate the listed three-point positioning method using the same drawing and film. The catalogue does not provide a numerical registration guarantee for either model. Obtain measurements from several positions across the layout and from more than one point in the trial run. Compare the results against the job’s limits.
Measure distances within the image as well as its location against a mark. If the film changes dimensions, aligning one reference may leave a mismatch elsewhere in the repeat. Discuss the compensation available in the proposed configuration, then check the result after every pass needed to make the transfer.
On a later pass, the printed face may meet rollers or supports. Trace those contact points and inspect the film for marks that could appear in the transferred image. The WL-5080CCD catalogue lists handling intended to reduce scratches; verify the surface result on the selected material. Include the smallest lettering and the heaviest printed area in the test artwork.
Match drying to the chosen transfer ink
The technical sheet for each ink and adhesive sets the drying requirements. Supply it with any processing limits for mixed components. Review intermediate and final drying, then agree when the film is ready for rewinding or the next printing pass.
For a water-based textile example, Marabu’s April 2025 Maqua Tex MAXT+ technical sheet describes printing on release-coated carriers and gives tunnel-dryer settings of 80–140°C for 80 seconds to 2 minutes. It also warns that excessive temperature with short drying can leave water trapped, while heat can deform the substrate and affect registration. Those figures apply to MAXT+ under the sheet’s conditions. Compatibility with either Winshol configuration needs a separate review and trial.
Request the proposed dryer path, temperature range, airflow, exposure time and cooling arrangements for the quoted configuration. Match these details to the film and ink deposit. A dense backing area may dry differently from a fine graphic, so both belong in the test artwork.
Record printing-stage drying and transfer-application settings separately. Drying prepares the printed carrier for subsequent handling; application transfers the selected construction to the receiving product. Use the consumable supplier’s instructions for each stage. The UV curing versus hot-air drying guide explains how to review a drying route against the ink system.
Inspect the cooled film before it is rewound. Then unwind a representative sample after the planned hold and look for sticking between surfaces, print pickup or release-surface damage. Repeat the application test on stored samples if printed transfers will be held in inventory. Record the storage conditions and elapsed time rather than reporting only the result from a freshly printed piece.
Approve a transferred sample and a repeatable production run
Use production film, the intended consumables and the artwork version that will be ordered. Include representative receiving products. Agree on the sample locations, measuring methods and acceptance limits before the run, and keep an unprinted material control for dimensional checks.
Record the screen and stencil information, squeegee setup and dryer settings for each pass. Take samples at startup, during stable running and later in the roll. Inspect the print before application, then trace the same samples through cutting, transfer and peeling. If a defect appears, knowing when it first became visible helps the equipment and consumable suppliers investigate it.
At the application stage, record the equipment, temperature, dwell time and pressure setting, along with the peel timing and method. Use the combination specified for the actual transfer system. Inspect release completeness, image edges, color, opacity and placement on the receiving product. For textile work, add the required stretch, wash or other durability checks after the supplier’s specified conditioning period.
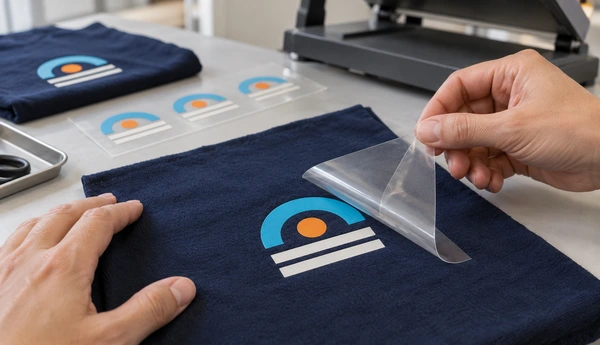
Avient’s garment-transfer troubleshooting guide identifies drying, receiving-material compatibility, application heat and pressure, and peeling among the causes to review when transfer adhesion or release is poor. Its examples include transfer paper. Treat that guide as a reminder to inspect the complete route; use the selected film supplier’s instructions for the PET carrier in your job.
Test the artwork area nearest the edge of the application equipment as well as the center. Where the order includes different receiving materials or colors, test each approved combination and identify it in the report. Keep the measurements with the retained finished samples.
Estimate output from a timed job run. Count accepted transfers at the agreed stage and report setup waste, trial length and elapsed time, including repeated printing passes, drying and handling between them. The catalogue provides no clear accepted-output rating for this complete route.
Send the film and ink grades, layer drawing, full repeat layout and finished acceptance plan with the quotation request. The screen printing machine RFQ checklist covers the wider enquiry. Submit the application brief through Winshol’s contact page so the printing configuration can be reviewed against the intended transfer.
Common questions
1. What should I specify first for a heat transfer film screen printer?
Specify the receiving product and the finished image requirements. Add the carrier film grade, ink and adhesive system, artwork and printing sequence. Include the application and peel method so the trial can reach the finished-product acceptance stage.
2. Can I use any PET film for a screen-printed heat transfer?
Select a release-film grade intended for the chosen transfer system. Confirm the printable side, coating, finish and peel method with the film supplier, then trial it with the actual inks. The description “PET” alone does not specify those properties.
3. Which Winshol machines list heat-transfer applications?
The WL-5080CCD and WL-5080DW catalogue records both list heat-transfer applications. The former has CCD visual registration and hot-air drying; the latter is listed with three-point registration, a single-color configuration and an oven. Confirm suitability with production samples.
4. What print format do the two models support?
Both list a maximum print area of 500 × 800 mm, an 800 mm maximum feed length and an 800 × 1000 mm screen frame. Maximum web width is 520 mm for the WL-5080CCD and 510 mm for the WL-5080DW. Confirm layout margins and orientation.
5. Is CCD registration enough to approve a multicolor transfer?
Measure the required layer relationships on samples from the full pass sequence. Include dimensional checks after drying and the finished transferred image where required. The WL-5080CCD catalogue does not provide a numerical accuracy guarantee.
6. Should every transfer film be pre-shrunk before printing?
Follow the film supplier’s recommendation for the selected grade. Compare incoming and processed dimensions under the proposed drying sequence. Some release films are supplied with guidance that pre-shrinking is generally unnecessary; use a production-material trial to settle the requirement.
7. What drying and transfer temperatures should I use?
Use the selected ink, adhesive and carrier suppliers’ process instructions, then verify the finished result. Record printing-stage drying and application-stage heat separately. Confirm both stages for the specified film and receiving material.
8. Does printing heat transfer film make this a DTF inkjet machine?
The WL-5080CCD and WL-5080DW are screen printing machines. If the proposed job combines digital and screen printing, show which layers each process will produce and how the film passes between them. Approve the complete transfer construction on the receiving product.
