


Magnetic-Effect Screen Printing for Labels: What to Test Before Choosing a Machine
A magnetic-effect label may look right under the inspection lamp, then show marks after rewinding. Judge it at the end of the route it will actually take: printed on production stock, UV cured and finished. Start with a physical effect reference and a dimensioned drawing. Use the trial result to choose the equipment.
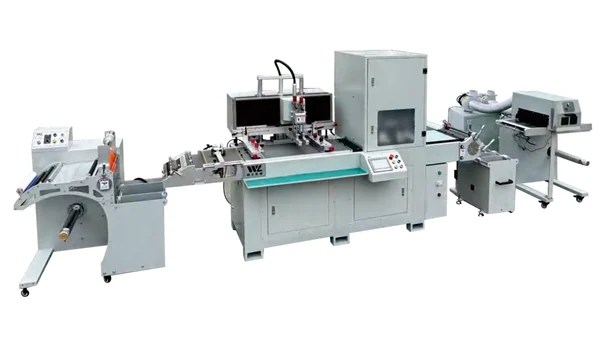
Winshol lists the WL-350D-CK-3D magnetic-effect UV screen printer with one printing color, magnetic control and a two-lamp UV dryer. Its catalogue names rolling-bar, ring and sphere effects. The intended result still needs an approved sample on the buyer’s ink and material.
What makes the visual effect different?
The screen defines the printed shape; magnetic orientation gives the wet ink its changing appearance. A published patent on screen printing and magnetic orientation describes magnetizable pigment being aligned by a field before the layer is cured. It explains the process principle. The WL-350D-CK-3D’s magnetic tooling and settings need to be checked with Winshol for the proposed job.
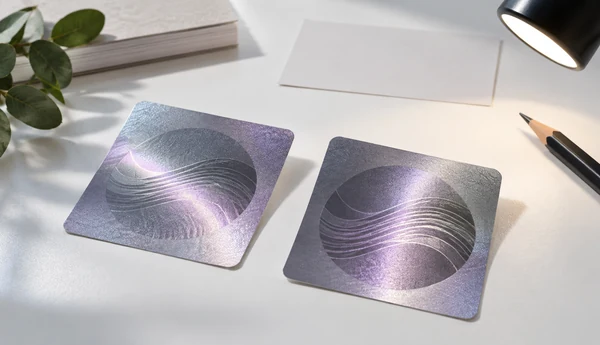
A still photo cannot show how a highlight moves. Bring a physical reference or a short video filmed under known lighting. Show where the effect sits in the artwork and agree on the angles used to inspect trial prints. A rolling bar, ring and sphere call for different visual results.
The word magnetic can also describe a coating that sticks to a magnet. Nazdar’s magnetic-receptive screen ink, for example, is made for attaching graphics to magnetic surfaces. It serves a different purpose from an ink whose particles are oriented to create a moving highlight. Specify the intended effect when contacting ink and equipment suppliers.
Define the finished label before selecting the process
Mark the effect area on a finished-label drawing, including its size and distance from other print and the die-cut line. If it overlays existing graphics, trial the preprinted stock. Alignment on a blank strip tells you little about the actual job.
Give the press operator a usable appearance standard: the approved sample, the light and viewing angles, and the amount of variation allowed between labels. The customer drawing should set position and cut tolerances. Without a common reference, two people may approve different looking samples while believing they saw the same effect.
If the label is intended for authentication, define how it will be checked. A visible effect alone does not establish resistance to copying. Any security claim needs separate validation.
Test the ink and label stock together
Send the ink supplier the production substrate and details of its surface treatment, existing coatings and liner. Include the planned finishing steps. Request an ink system for the chosen effect, with screen, mixing and curing guidance. An ink that adheres to one film may behave differently on another; the trial must use the stock specified for production.
A 3M screen-printing bulletin calls for cure and adhesion checks on its graphic-film and UV-ink system. Its UV settings belong to that system. For this job, use the selected magnetic-effect ink supplier’s test method and the customer’s end-use requirements.
Examine samples after rewinding, then after lamination or die cutting if those steps are planned. Look for marking, blocking, adhesion loss and a shift against the cut. A flat print taken straight from the machine can miss these problems.
Check artwork against the equipment limits
The WL-350D-CK-3D catalogue lists a 350 mm maximum web width, a 330 × 450 mm maximum print area, a 450 mm maximum feed length and a 550 × 700 mm screen frame. A roll can fit through the machine while its image and registration marks exceed the printable layout. Draw the lanes, repeat and effect area to scale before discussing tooling.
The listed line includes one printing color, a magnetic controller, two feeding sections, a two-lamp UV dryer, and unwind and rewind units. If the design needs other colors, show which equipment prints and cures them. This model’s single printing station covers the magnetic layer, not a complete multicolor sequence.
Ask Winshol to check magnet tooling, effect position, web path and UV setup against the drawing. The catalogue gives no magnetic-effect area or registration tolerance for this artwork, and its speed entry has an unclear unit. A timed trial on production material will give a useful output figure.
Run a trial that follows the whole job
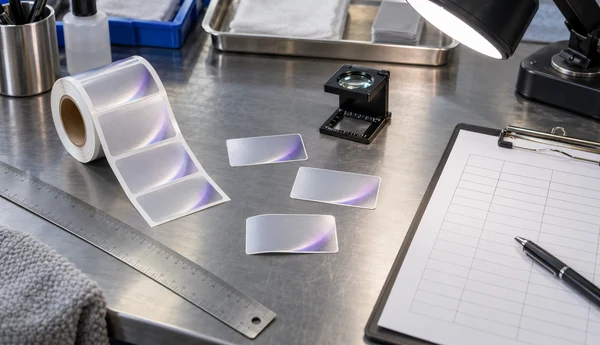
Run the intended ink and artwork on stock from the production lot. Keep the approved visual reference beside the trial prints. Log the screen, ink preparation, web tension, magnet setup, UV settings and speed used for each sample. The ink and equipment teams should agree on starting conditions before the run.
Take samples at startup and during steady running. Inspect them again after rewind and any planned finishing. Keep the light, viewing angle and inspection points the same. One good label at startup will not show whether the effect holds across the roll.
| Trial point | What to record | What it answers |
|---|---|---|
| Incoming stock | Material and liner, lot, width, thickness, existing print and surface condition | Are the trial samples representative of production? |
| After printing and magnetic treatment | Effect position, appearance at agreed angles, print-to-mark alignment and actual settings | Does the effect form where the artwork requires it? |
| After UV curing and cooling | Appearance, cure and adhesion using the ink supplier’s procedure | Is the layer fit for handling and the next process step? |
| After rewind and finishing | Blocking, scuffing, effect consistency and print-to-cut position | Does the finished label meet the approved sample and drawing? |
Write the pass criteria before the run: appearance range, position tolerance, ink checks and finished-label requirements. Keep failed samples with the good ones. If the job passes only at one tested speed, record that speed as a condition of the result.
Use failures to choose the next test
If the highlight is weak or misplaced, compare the printed ink deposit and magnet position with the approved setup. The ink and equipment teams can then decide which condition to change. Record each adjustment; otherwise a better second sample may not tell you why it improved.
An effect can look right while the ink still rubs off or sticks to the next wrap. Check cure and adhesion with the ink supplier’s method before changing UV exposure. If the layer is sound but misses the existing artwork or die cut, measure the web and registration references through the line. Our registration-mark guide shows the samples and artwork needed for an alignment review.
When only a few labels pass, note where they came from. Compare startup with steady running and check each lane across the web. An average may hide an edge lane that misses its cut on every repeat. Keep the settings that produced acceptable finished labels with the trial record.
Decide whether the magnetic configuration is necessary
If the artwork calls for a conventional single-color UV layer, look at the WL-350D UV roll-to-roll printer. It has a two-lamp UV dryer and the same listed 350 mm web-width and 330 × 450 mm print-area limits. Its specification does not list magnetic control. The approved artwork and ink process determine which configuration to trial.
The WL-350D-CK-3D’s listed main-machine dimensions are 2500 × 1100 × 1700 mm, with a 380 V main-machine supply. Get the full line drawing and electrical schedule before reserving space or power; the magnet equipment, UV dryer and roll handling also need room.
For a quotation, send the physical effect reference and dimensioned artwork with the stock, liner and proposed ink. Include web width, repeat, any existing print, alignment tolerance and finishing route. The site’s RFQ checklist covers installation details and other information the equipment team will need.
Common questions
1. Is magnetic-effect printing the same as printing on magnetic sheet?
Magnetic-effect printing changes the label’s appearance as it is viewed from different angles. A magnetic sheet is a substrate; a magnetic-receptive coating lets a graphic attach to a magnet. Show the supplier the effect you mean.
2. Will any UV screen ink produce a rolling-bar or ring effect?
The ink needs suitable magnetizable pigment and must work with the substrate and curing process. Request a compatible system and trial guidance from its supplier.
3. Does “3D” in the model name mean additive 3D printing?
Here “3D” refers to the apparent depth of the rolling-bar, ring or sphere effect described in the catalogue. The machine screen-prints a layer; it does not build a physical object layer by layer.
4. Can the effect itself prove a label is counterfeit-resistant?
Only a validated authentication method can support that claim. Specify how the finished feature will be checked and have it assessed for the intended use.
5. Can a 350 mm web carry a 350 mm wide magnetic-effect image?
No. The web-width limit is 350 mm, but the maximum print area is 330 × 450 mm. Draw the image, margins and marks to scale, then confirm the magnetic tooling coverage.
6. Is a successful flat sample enough to approve production?
Inspect samples after curing, rewinding and the planned converting steps. Compare labels from different parts of the run with the approved effect and drawing.
7. What output figure should I request from the supplier?
Ask for accepted labels per hour from a timed trial on your stock and artwork. Record the effect, cure and registration settings used. Our roll-to-roll output guide explains how to calculate the figure.
Send your artwork, material and reference effect through Winshol’s contact page to arrange a documented material trial.
